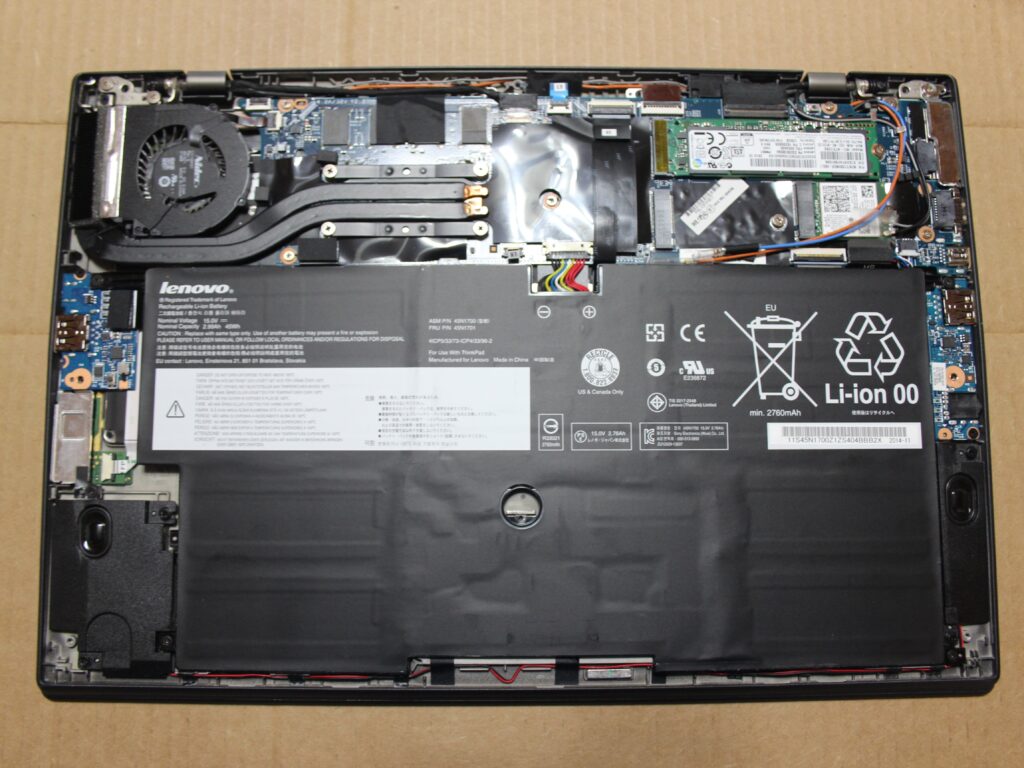
Replace Battery on Lenovo Carbon X1

Replacing the battery in a Lenovo ThinkPad X1 Carbon (or similar models) involves several steps. Make sure you have the correct replacement battery for your specific model before starting. Here’s a step-by-step guide:
Preparation
Power Down the Laptop:
- Shut down your Lenovo ThinkPad X1 Carbon completely.
- Disconnect all external devices (USB drives, external monitors, etc.).
Unplug the AC Adapter:
- Remove the power cable from the laptop to ensure no power is running to the device.
Gather Tools:
- You’ll need a small Phillips-head screwdriver and a plastic prying tool or spudger.
Replacing the Battery
1. Access the Battery
For X1 Carbon Gen 5 and Gen 6:
- Remove the Bottom Cover:
- Place the laptop on a clean, flat surface.
- Use a Phillips-head screwdriver to remove the screws securing the bottom cover. Keep track of the screws as they may vary in length.
- Carefully use a plastic prying tool to separate the bottom cover from the laptop. Gently work around the edges to avoid damaging the plastic clips.
For X1 Carbon Gen 7 and later:
- Remove the Bottom Cover:
- Similar to the Gen 5/Gen 6, remove the screws and carefully pry off the bottom cover.
2. Locate the Battery
- Identify the Battery:
- Once the bottom cover is removed, locate the battery. It’s usually a large, rectangular component connected to the motherboard.
3. Disconnect the Battery
- Disconnect the Battery Cable:
- Carefully disconnect the battery cable from the motherboard. Gently lift the connector by its edges; avoid pulling on the wires themselves.
4. Remove the Old Battery
- Unscrew the Battery:
- If the battery is secured with screws, use a Phillips-head screwdriver to remove them.
- Carefully lift out the old battery from its compartment.
5. Install the New Battery
- Place the New Battery:
- Position the new battery in the compartment.
- Secure it with screws if necessary.
- Reconnect the Battery Cable:
- Gently connect the battery cable to the motherboard. Ensure it’s properly aligned and securely connected.
6. Reassemble the Laptop
- Replace the Bottom Cover:
- Align the bottom cover with the laptop’s base.
- Press it gently into place, ensuring that all clips are properly engaged.
- Screw the Bottom Cover:
- Reinstall the screws you removed earlier to secure the bottom cover.
7. Power On the Laptop
- Reconnect the AC Adapter:
- Plug the power adapter back into the laptop.
- Turn On the Laptop:
- Power on your Lenovo ThinkPad X1 Carbon and check if it recognizes the new battery.
Post-Replacement Steps
Check Battery Status:
- Go to Settings > System > Battery (in Windows) to verify that the new battery is recognized and charging correctly.
Perform a Battery Calibration (Optional):
- It’s sometimes recommended to calibrate the new battery by fully charging it, then allowing it to discharge completely, and recharging it to 100% again.


